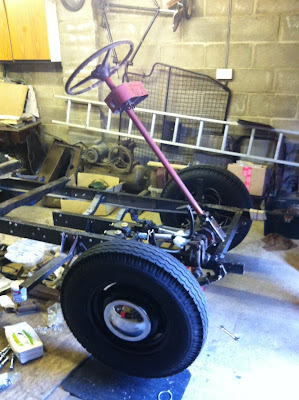
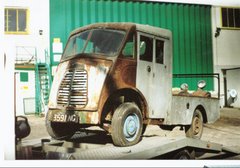
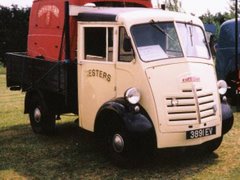
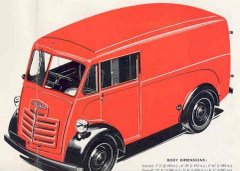
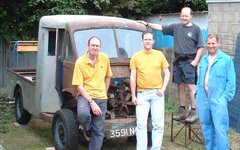
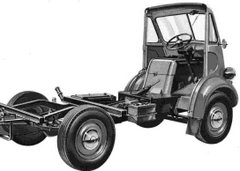
Martin popped round with his girlfriend (and my former colleague) Kelly for a cuppa and to bring over an internal wing he has repaired and the propshaft, which he has cleaned up and painted.
Progress.
(I wonder if I will have ANY hair left when I finish the project. Need to get a move on - the owner of the garage is planning to sell it)
Sunday, 25 November 2012
Sunday, 4 November 2012
inter-GRIPPING Progress
Martin has been hard at it, again, and this time has restored the nearside floor support panel, which was riddled with holes. He came round today and we dry-fitted the panels on the chassis; the driver's side one is the one I fabricated using the original as a pattern.
Martin used some inter-grips, which I bought online, to hold two pieces of steel very slightly apart, so that they could be butt welded together really well .
Martin used some inter-grips, which I bought online, to hold two pieces of steel very slightly apart, so that they could be butt welded together really well .
And parallel with Martin's, the one I made some years ago:
Good progress. Martin took away an internal wheel arch and the prop shaft, to work on when he gets his mojo.
Thursday, 18 October 2012
Postponements
Martin and I keep planning weekends of metalwork but either I or he, or both of us just haven't been in the mood. But I have been talking to Dad about it this week, and I know for sure that I am going to get back into it soon. Had a few hard weeks at school and I have really needed blobbing-out weekends to recover. But half term isn't far off.
Saturday, 22 September 2012
Quickly, take it! These bits are heavy!
Today we listed the panel repair jobs yet to do and I showed Martin where the panels go. This is not the best shot, but that's because we were holding several bits on the chassis and snapping at the same time. We are getting close to an exciting stage...bolting floor supports and inner arches, etc. to the chassis.
Sunday, 16 September 2012
Achieved my New Year's Resolution
Having put the engine and gearbox back on the chassis
I have achieved my
I am delighted.
,
,
a Landmark Day - Engine in!
Follow this link (with sound on) to the engine running in its test bed.
Here's the day, nine whole years ago that the engine came out.
Clutch on
I have never played with a clutch before, so this was a special day. Especially simple was replacing the thrust bearing. What a cute bit of design that is...positioned in the actuator with two very simple springs.
 |
| click for clarity |
Martin and I loved this technique for simplicity and think that any enthusiast who hooks up with others in an owners' club ought to be able to find someone who has an input shaft they can borrow for the purpose.
Thursday, 23 August 2012
Clutching
"B Series" Colin got me a clutch plate, clutch cover and thrust bearing, which I collected today. Turns out he got them from NTG, who have sold me a number of parts over the years. I forgot to order some clutch-to-flywheel bolts, so Colin is going to look some out for me next week (together with some of those locking pieces - whatchermacallits ....like a washer across two bolts), which means we won't put the engine in this week, as hoped. But it may be as well anyway because Martin has an early morning airport run tomorrow and I have to source a single castle nut for the back axle.
While I was there I also got my engine sling mounts, which Colin had forgotten to put back on when he serviced the engine. He is going to service my carburetter as soon as I give him the nod.
The short delay gives me time to clean the greasy, claggy deposits off the gearbox housing and to take the old mounts off .
Tuesday, 21 August 2012
Shocks on
We didn't get on with the van until late today because I went flying instead. (You will remember that flying put this project on hold for four years!)
Martin and I put the shocks on.
Monday, 20 August 2012
Clutch
I just heard from B-Series Colin. He has the clutch, thrust bearing etc ready for me to collect...probably Thursday. And there is a fair chance the engine will go back on the chassis on Friday, now :)
Gearbox will need a de-greasing first.
Gearbox will need a de-greasing first.
Sunday, 19 August 2012
Aaaaand, we're back!
Crisis over!
Yesterday I decided there was no way I was going to drill the casting....I had to do it properly! So I took the front axle off and carried it (including the wheel drums, which I had hoped not to have to remove) back round to my workshop.
Then I tried to remove the hydraulics, so as to protect the piping, but one banjo wouldn't release, so I decided to remove the drums whole, which the manual says can be done. But I found that the studs started turning, so realised I was going to have to crack the brake drums, but then two studs fell into one drum....so thought, bugger, that'll make it impossible to use a puller.
That all left me very down last night when I called it a day.
Feeling refreshed this morning, I used wood, hammer and care to split the drums and dismantle the wheels, then texted the good news to Martin who, suitably impressed, suggested coming to see the progress.
He came and helped me use the press to push out the kingpins, which slid out beautifully, so that I could swap the stub ends over. I made a drift with a key to stop it slipping out of the king pin under pressure and Martin came up with a clever safety feature, making a sleeve which slipped over the end of the press end-effector and the drift - to stop the drift pinging sideways and putting a hole in my head.
Once we had re-assembled the stubs on the axle, we went back across to the garage to put the axle back on, re-assemble the brakes, etc and put the wheels on.
Once we had re-assembled the stubs on the axle, we went back across to the garage to put the axle back on, re-assemble the brakes, etc and put the wheels on.
Now THAT is great progress, even if it does only put a set-back right.
No time has been lost because we weren't planning to put the shocks on until Tuesday...and then once we have the clutch, which "B Series" Colin is sourcing for me, we are going to put the engine in!
Saturday, 18 August 2012
set-back!
This is rather infuriating, but have just discovered, years after doing a lovely job on the kingpins, that I put the stub end knuckles on the wrong ends of the front axle, presumably assuming that the axle was symmetrical, which on the surface it appears to be. Be warned, however. The holes which take the bottom lug of the shock absorbers have a rebate to accommodate a shoulder. The lug hole should be pointing forward.
Now, we did think of drilling a rebate into the casting from the other end (about 8mm deep, 13mm diameter). After all, the hole is well piloted. But it feels the wrong solution to me. Utterly frustrating though it is, I need to do this right and push the kingpins out and swap the knuckles over.
(Note to self...keep the king pins and bushes, top and bottom, with their stub ends; it is only the axle which is being swapped over)
Tuesday, 14 August 2012
Winning the numbers game
I have learned a valuable lesson in the restoration game. In searching for suitable shock absorbers for the 101 I have been searching for the original parts numbers, imagining that at very least the search would throw up an associated modern equivalent, when what I should have been doing was using the numbers Martin used. What he asked himself was, "What will these parts do? And what vehicle uses parts which have open and closed dimensions which are similar?"
Instead of looking for "Armstrong 62-0010,
woodhead 03107, 03144, 03146, 08399 Girling 3991" I should have been looking for 15" open and 10" closed.
Total price for the pair, £47.52.
That brings me on to some other numbers. A classic car parts specialist told me he could solve this problem for over £100, which struck me as steep, so I asked who made the parts and he got cagey...saying the details would be on the invoice. I told him I'd rather buy from someone willing to be more open with the details. I am glad I did. It more than halved the price.
.
Saturday, 11 August 2012
Brief Reflection
It does seem to me that the project really has got to the stage of being a Meccano set....and it is pretty much like this with most classics you buy and own; or at least it was with my Prefect and now with my Morris 1300. Just a matter of sourcing the odd bit once in a while to keep it running. Or perhaps even stripping a system down (the brakes or the engine) to do some major servicing.
But my J Type project has been much more than that because there is not one single bit which hasn't needed stripping, fabricating or replacing....sourcing (which takes the most time)....and along the way, the acquiring of skills...welding, sheet metal fabrication, etc. So it has been a long old haul.
But it really is now a Meccano set, very largely. And that means that progress is happening much more quickly, which is Soooo good for the soul! But even that would not have happened if Martin hadn't got excited reading this blog, and given me the kick needed to get under way. He is a clever bloke and it is fun sharing the project with him.
One good turn deserves another
Martin got so excited about me putting the wheels on today that he came round and helped me put the steering on, made possible by his mate having straightened the track rod out. I need track-rod clamps to secure the TREs and a few split pins to secure bolts, but apart from that the steering is now solid.
.
.
Friday, 10 August 2012
Thursday, 9 August 2012
A Tyring but satisfying day.
 |
| (click first image for a scrolling slideshow) |
Mark reckoned he might remember taking the old tyres off the wheels years ago, but I said there was a fair chance he was still at school! But look at this - he might be right after all!
At this point, Mark found that the set up on the machine (which had worked for the other four) was wrong for the last one. He compared the rim to the others with a caliper. This one is now my spare, only because its rim is more curled than the others. Nothing wrong with it. Can't remember what they said it is called.
Then the wheels were balanced with strips of weight on the INSIDE of the wheel.
All but one done. All five now stand in Paul's garage waiting to be bolted on...once I manage to source a pair of front shock absorbers.
Tuesday, 7 August 2012
Side lights
I just got my side lights - Lucas 489s (52138) on ebay. These are remanufactured parts....with new rubber and bulb holders, rechromed bezels and original glass fronts.
more shocking news
Thanks to Mike in Redditch's advice, I just found a pair of KYB443020 shock absorbers for £45 new (incl postage)...and bought them. Am feeling rich only because my tyres cost half of what I budgeted for, so can afford to treat myself today.
Shocking tyre news :)
Mike (Redditch, UK) very kindly pointed me to a posting on his own restoration blog, where he has a solution for the rear shock absorber: they come from a Mk 1 Ford Escort.
And Simon at Longstone Tyres, once he understood that I wanted high wall tyres to compensate for the aesthetic loss due to having 15" rather than 16" wheels, suggested using 670x15 Camac 6 Plys, which, as it happens, are half the price of the Avons, and have a more commercial vehicle look about them. The Camac's diameter is 37mm greater. What's more, he is happy for me to put them on the vehicle and return and exchange them if they are not right!
Saturday, 4 August 2012
Progress
 |
| Martin |
Martin came round for a couple of hours today and made light work of spot welding my quarterlight repair piece. His welder is much better than mine, and he has very kindly lent it to me for the summer.
He has also taken away, cleaned up and painted my engine mounts and I bought front and rear mounting bushes from Earlpart Ltd on eBay, so once the shocks and tyres are sorted, we will be able to refit the engine and gearbox.
 |
| Me, with rather less hair, as evidence of how long this project has taken. |
I am quite chuffed about a little bit of genius of my own, here. The made to measure J Type pipe was too short to pass over the chassis member, as it is meant to, because I have used non-original master cylinders (these are made for Morris Minors) which are cast slighly differently. I made it fit by passing the pipe up inside the chassis
Thursday, 2 August 2012
see what I mean?
just received this from Martin. What did I tell you...he is great at research!
Hi Peter,
I feel like im getting somewhere
I found out the open/close length, for a j type shock, and its 15” open and 10” closed.
This into metric is 254mm closed, and 381mm open.
Looking through the internet, I found that beetles, and early camper vans have shocks which are Very close to this size.
Have a couple of links which I found.
This one should translate, it did for me.
a couple of options,
what do you think?
Kick-start
Roly (good to be in touch with him again) has asked me to update the blog, so here we go:
Martin, early twenties, foreman of a manufacturing plant and partner of a collegue, has read lots of this blog and become very enthusiastic about the project, and he has volunteered to come over after work and help really move it along. As I said, a good kick is what it needed.
One thing he is good at is online research. I always thought I was good at it too, but he has a real knack for it. For example, we have just ordered front and rear engine mounts, which are not listed for the J type specifically, but for other Austin/Morris motors, incl the J4. The front mounts arrived this morning and look right. I have also bought a set of track rod ends and Martin knows someone who will straighten out the track-rod, which has a kink in it.
We are looking for shock absorbers now. Roly says that I am looking for:
Part numbers for front shockers are Armstrong 62-0010,
woodhead 03107, 03144, 03146, 08399 Girling 3991.Rear, Armstrong 62-0021, Woodhead 09274, Monroe 7014,
Gabriel 17360.Nothing comes up with those numbers, so I would be interested in what alternative solutions others have found. Martin is looking into whether VW Camper springs will be suitable.
The other night we went into the garage and test fitted the clutch master cylinder, brake and clutch pedals and other bits, and we did a complete audit of parts....and boxed up the old bits which we won't be using; they will go on ebay as pattern/reference bits. The only bit I had which I can't find is the starter motor, but I daresay it will show up.
I am off school for the holiday, so the masterplan is to get the van on its wheels and put the engine and gearbox in, the rad on and hopefully the front scuttle. I still have some welding to do on the scuttle and wings.
My Godfather has recently died and left me enough to buy a set of tyres, which will seriously kickstart the project.
So, there you have it. I wonder if anyone will read this.
Tuesday, 3 July 2012
This summer
A mate has just been round and we have sized the project up and decided to do it this summer (school holiday)!
Finally, the kick up the pants that I needed!
Thanks Martin!
Finally, the kick up the pants that I needed!
Thanks Martin!
Sunday, 1 January 2012
New Year's Resolution 2012
Ok, I am scared of promising something that just isn't possible, but my resolution this year, emboldened by the success I had in meeting last year's goal (nothing at all to do with the van, predictably), is to at very least get the chassis rolling and engine and gear box in this year!
The bit that stops me promising myself I will finish the van is the metalwork.....but recent success with that makes even that do-able
But dammit, that's it, I am determined to turn this project around this year!
Happy New Year, Everyone!
The bit that stops me promising myself I will finish the van is the metalwork.....but recent success with that makes even that do-able
But dammit, that's it, I am determined to turn this project around this year!
Happy New Year, Everyone!
Subscribe to:
Posts (Atom)


