Monday, 23 June 2014

changing hands


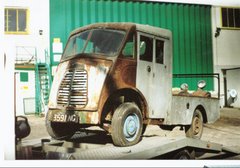
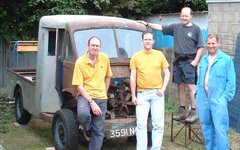
A quick selfie showing the old owner handing 3591 NG over to the new owner before he drove his horse box away, loaded up with a front scuttle, the bulkhead, folding doors, panels, wings and boxes of parts; the chassis to go Tuesday morning.

Beneath the horsefeed, 3 front panels. The Goat Lady's on the bottom, the Morris one NG came with, and the new ex-stock Austin one Mike Cotton sold me. And, on top of them, a mangled spare wheel carrier. The latter is a case in point: the buyer's appreciation of that mangled bit of iron's worth tells me he understands J Types.

He came highly recommended by Roly. After my various dealings with dodgy characters in the past, who take advantage of a J Typer's good nature, it is good to know that NG is going to be finished by a true enthusiast.

Will I be gutted when it is finished? I don't think so, now. I thought I might be, but the time was right to sell. However close to being finished it might be, I knew in my heart of hearts that it would not be me who did it. The buyer was enormously complimentary about all my metalwork on the scuttle, how complete the rolling chassis is and about how easy I have made it for him to finish it off.  So, I wish him well with it.

Thursday, 19 June 2014

SOLD!

Thank you all for your interest and kind offers; have never before been offered desirable sports cars as swaps! Discretion dictates that I give no details of the sale. But what I will say is that both the seller and buyer are delighted, and I am especially pleased to be able to report that the 101 is staying "in the family", so to speak; it is not going to some opportunistic dealer, but to a real enthusiast. And so gratifying that he had read this blog from start to finish and so appreciated what I have put into the project. 

Saying goodbye to 3591 NG will be a wrench after all these years, but it will be good knowing that someone is going to finish her properly.

Wednesday, 11 June 2014

A summary of work done

The project has involved the repair of much of the scuttle and replacement of lots of panels. Please click on the following links:

"A" pillar ; inner arches ; inner wing ; panel interior ; dash panel with captive nuts ; outriggers ; radiator frameradiator sides,dash repairrad blanking platecab floor support ; quarterlight sill


Clutch replaced


Running chassis 98% complete

with newly forged leafsprings front and back and brakes re-lined, hydraulics replaced


radiator re-cored and mounted in a rad stand I fabricated myself

 Parts and panels bought and third party work carried out


.

Tuesday, 10 June 2014

Breakdown of expenditure for those considering buying my project

The following is my verifiable outlay so far (in terms of parts and third party labour)

Initial purchase price    551.00
McKenzie inner arches approx    30.00
McKenzie front valance   58.00
McKenzie front valance top panel   14.00
engine work by third party   90.00
re-core radiator   217.38
newly forged leafsprings all round   634.50
bush shackle   9.40
wheels shot blasted and re-painted (900 two-pack)by third party   100.00
fitting tyres to wheels   50.00
petrol tank repaired 60.00
POR15  25.00
starter motor 59.00
hydraulic pipe kit (made to measure) 104.12
rear shocks   44.99
engine mountings   11.48
12.59
side lamps   82.00
front shocks   47.52
classic tyres   497.10
king pin set    44.00
pull off springs   42.65
brake shoe re-lining   88.00
wheel bearings   24.45
front wheel cylinders (MG TD/TF)   99.35
two mater cylinders   105.00
misc bushes from NTG 9.40

Grand Total    £3,110.93 

PLUS
other expenditure for which I can't find the receipts:
clutch plate, clutch cover and thrust bearing, 
ex-stock, brand new and primed Austin 101 front panel
handbrake cable
track rod ends
etc

Any price finally agreed upon would have to cover at least the outlay so far on parts. I do not know how to quantify the work done to get the van to the stage it is at now. Have a look at how far I have come, by looking back through the blog. What we have now is a rolling chassis with engine (run on test bed but needs finished carb and exhaust), gearbox, prop shaft, breaks (hydraulics to be completed), wheels, tyres, shocks and leafsprings. To go on to it we have a front scuttle on which I have done lots of work, but which is not yet finished. Also have lots of metalwork done on inner arches, steps etc.

I also have lots of other parts: doors, wings, inner wings, sliding door runners, cab back, floor supports, floor panels, headlamps (originals and replacements), etc


Saturday, 7 June 2014

Selling the project

Well folks, I think I have finally given up. I have bought another plane, started another metal project, set up self-employed and ...well, the list goes on. But the long and short of it is that I have run out of steam for my Austin 101 and need the garage and mental space.

Readers who have followed the project in the past will know how much work I have done on it over the years. Loads of metalwork. The engine now runs and is mounted back on the chassis in  front of the gearbox and shaft on fresh rubber mounts. 

It has new brakes, new hydraulic piping, new slave and master cylinders, a thousand pound's worth of 5 brand new classic tyres. Newly forged leaf springs all round and freshly mounted new shock absorbers. The scuttle is nearly ready to be mounted on the front of the chassis around a newly re-cored radiator, sitting on a newly fabricated frame. 

I shall be working my way through the receipts to try to work out just how much I have spent on parts over the years, and other than recouping the initial outlay, I only expect to recover the cost of parts and re-fabricated parts. 

Nothing will compensate for the thousands of hours spent on the project, but that never matters. Nobody does it for the money. It is all about the pleasure of the challenge. Someone keen could finish the project in about 6 months...,and I don't think I want to know about it when they do, because it is too frustratingly close to completion and I don't need my nose rubbed in it.

But I just know that I don't have the motivation, now, to finish it...and more importantly, I have other things making demands on my time.

So, get in touch if you are interested. If I don't sell privately in the next couple of weeks or so, I think I shall put it on ebay.

Read back through the blog to see what you'd be getting for your money.

Wednesday, 6 November 2013

inspiring


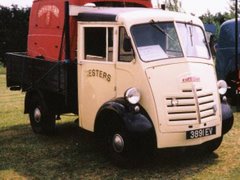
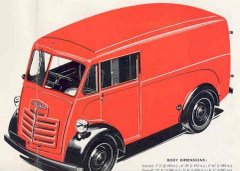
I have something like this is in mind for my 101, except with my milk float folding doors.

Tuesday, 5 November 2013

Back from the dead

So, in the year I hit 50 (still young!), I was hit by depression, work related stress and then was hospitalised with pulmonary embolisms in both lungs! Jeeezus!

Nearly dying is just about the best reason for not making progress on my Austin. But I am back from the dead, now, rattling with pills, and Martin and I have our mojos back.

A few days ago we fitted my new starter motor

Sunday, 10 March 2013

Call the Midwife

on TV this evening

Wednesday, 20 February 2013

Making tools from scrap steel

Spent a couple of days re-organising my workshop, clearing out clutter and welding up new stands for fabrication tools. 

Making the quarterlight sill was tricky because I'd lost the base for the sheet bender and had to clamp the tool to a workmate. 
All very unsatisfactory. 
So I decided I needed to make something much more substantial.
 
 Sheet bender gets a rigid base

 A box section in front of the bender provides a tower for a quickly removed shrinker tool 
(same for the stretcher on the other side of the bench)

A rigid support tower for my guillotine

. . .  and all made from scrap, including the workbench which was rescued from a demolition.


Sunday, 17 February 2013

quarterlight window sill


 It has just occurred to me that I have done a few bits of scuttle metal work which I haven't recorded. Among them is the sill of the driver's side quarterlight. It was riddled with rust and so rather than bodge repair it, I decided to remove it and fabricate a replacement part.
Mine is more radiused, less sharp-angled than Mr Morris's, but I think he got that wrong. The radiuses on mine are similar to the ones edging the windscreen. Also, I used thicker material, so I think it ought to add strength. I have decided that I like it so much I am making one for the other side, even though that one is in ok condition.

Will weld it in next weekend. Will also then fit starter motor and coil.

Sunday, 25 November 2012

wings and shaft

Martin popped round with his girlfriend (and my former colleague) Kelly for a cuppa and to bring over an internal wing he has repaired and the propshaft, which he has cleaned up and painted.

Progress.

(I wonder if I will have ANY hair left when I finish the project. Need to get a move on - the owner of the garage is planning to sell it)


Sunday, 4 November 2012

inter-GRIPPING Progress

Martin has been hard at it, again, and this time has restored the nearside floor support panel, which was riddled with holes. He came round today and we dry-fitted the panels on the chassis; the driver's side one is the one I fabricated using the original as a pattern.
Martin used some inter-grips, which I bought online, to hold two pieces of steel very slightly apart, so that they could be butt welded together really well .

And parallel with Martin's, the one I made some years ago:
Good progress. Martin took away an internal wheel arch and the prop shaft, to work on when he gets his mojo.

Thursday, 18 October 2012

Postponements

Martin and I keep planning weekends of metalwork but either I or he, or both of us just haven't been in the mood. But I have been talking to Dad about it this week, and I know for sure that I am going to get back into it soon. Had a few hard weeks at school and I have really needed blobbing-out weekends to recover. But half term isn't far off.

Saturday, 22 September 2012

Quickly, take it! These bits are heavy!

Today we listed the panel repair jobs yet to do and I showed Martin where the panels go. This is not the best shot, but that's because we were holding several bits on the chassis and snapping at the same time. We are getting close to an exciting stage...bolting floor supports and inner arches, etc. to the chassis.

Sunday, 16 September 2012

Achieved my New Year's Resolution


:)
Having put the engine and gearbox back on the chassis 
I have achieved my 
I am delighted.


,

a Landmark Day - Engine in!


Follow this link (with sound on) to the engine running in its test bed.

Here's the day, nine whole years ago that the engine came out.

gearbox


Clutch on


I have never played with a clutch before, so this was a special day. Especially simple was replacing the thrust bearing. What a cute bit of design that is...positioned in the actuator with two very simple springs. 

click for clarity
We centred the parts of the clutch with a spline on the gearbox input shaft from another gearbox - an ingenious idea of "B-series" Colin's. He lent me the shaft for the job.

Martin and I loved this technique for simplicity and think that any enthusiast who hooks up with others in an owners' club ought to be able to find someone who has an input shaft they can borrow for the purpose.


Thursday, 23 August 2012

Clutching

"B Series" Colin got me a clutch plate, clutch cover and thrust bearing, which I collected today. Turns out he got them from NTG, who have sold me a number of parts over the years. I forgot to order some clutch-to-flywheel bolts, so Colin is going to look some out for me next week (together with some of those locking pieces - whatchermacallits ....like a washer across two bolts), which means we won't put the engine in this week, as hoped. But it may be as well anyway because Martin has an early morning airport run tomorrow and I have to source a single castle nut for the back axle.

While I was there I also got my engine sling mounts, which Colin had forgotten to put back on when he serviced the engine. He is going to service my carburetter as soon as I give him the nod.

The short delay gives me time to clean the greasy, claggy deposits off the gearbox housing and to take the old mounts off .

Little by little, it is all progress :)

Tuesday, 21 August 2012

Shocks on


We didn't get on with the van until late today because I went flying instead. (You will remember that flying put this project on hold for four years!)

Martin and I put the shocks on.

We were going to put it down on its wheels today until, leaning on one back wheel revealed that it did not have its castle nut on the end of the axle!! Goodness knows where I put that, so tomorrow I am off to the MG parts place to see if I can get some, along with some hydraulics banjos.