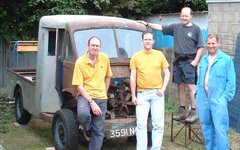
On Tuesday, on a journey back from visiting my dad, I stopped in on Magpie to collect a fuel tank and some wheels....and to see his vans and compare notes.

Magpie and ROD 525
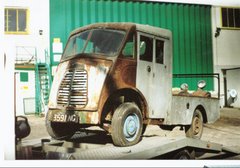
I was particularly pleased to see ROD 525, the tradesman's J Type truck, which Truman and I had hoped to buy together earlier this year. Seeing it brought home to me just how utilitarian some J Specials were; designed for the job but with no frills. It was inelegantly put together and roughly patched throughout its working life. This in turn makes Magpie's restoration philosophy fit so well. Some, he says, criticise the way he will hand-paint his cabs with brushes or rollers, and the way he will use pattern or even just compatible parts to get his vans mobile again...rather than being a purist.
Truman and I have talked about this before...
and I have written about it. I like any classic vehicle to look authentic....to look as it did when it was working, rather than when it left the factory; and I especially dislike a vehicle which is claimed to be "concours" condition, or worse still, "better than when it was manufactured". So I have a lot of time for Magpie's attitude.
People may criticise the restorer who "bodges" (Magpie's word, not mine), uses non-original parts or paints his vans with a hand-roller, but what Magpie does is rescues rare vehicles from barns and rust-piles and gets them working and running again quickly, which has to be what it is all about. And if they look a little worse for wear, well, didn't they always? These were workaday vehicles, which is precisely why they are so rare today; nobody thought to preserve them....they were too ordinary.
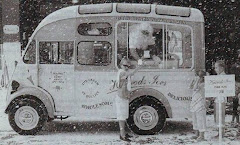
Magpie was very generous (coming home from work to see me) providing me with parts, contacts and tips and even a set of photos which he took when his van was used in the Dr Who episode, "The Idiot Lantern". I had no idea the Tardis was a flat-pack, did you?
Let me know if you fancy a set of 50 behind-the-scenes pictures of the making of the episode featuring the van. I think Magpie is asking £10. He is also doing Code 3 models (based on Corgi J) of the van, which will be a rare limited run. (I'll forward any enquiries).

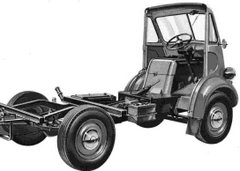
I took some photos, especially of ROD's roof. I think I shall be using that technique - wood frame. Other points of interest were the fact that ROD had a small running-board, so that the step area could be boxed in, and she had an abbreviated passenger seat, necessary when you have an off-set engine in the cab.


Looking at the photo below, It has just occurred to me that, as well as boxing in the step area, the last user moved the near-side seat over to the left of the cab so that it sat above the step (rather than to the right of it). This will have helped greatly with the problem of space for a passenger within a cab accommodating an engine. I don't think I'd want to lose the step, or have a running-board, but I wouldn't mind having an off-set seat, and that might be possible if I made it one which folded down from the space behind the door.

Thanks for the hospitality, Magpie!
.JPG)
%5B1%5D.jpg)
.JPG)
.JPG)

.JPG)


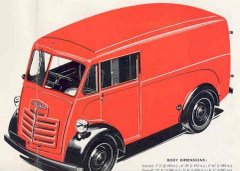
 The valance at the top is the original, bent beyond sensible repair and hardly worth the effort (take it from someone who's tried) when you can have a beautiful replacement like mine for £45 - with curves in all the right places and made from virgin metal! It came with a top panel (£8) which is the part on which the horn is mounted.
.JPG)


.JPG)
.JPG)


.JPG)
.JPG)
.JPG)
.JPG)
.JPG)